[Spring Boot 실전]3. 게시판에 Update 기능을 추가하자
이전에는 Create와 Read 기능을 만들었다.
이번 시간에는 기존의 게시글 기능을 수정하고 삭제할 수 있는 기능을 추가해보자.
html 코드 수정 및 controller 요청
현재 articleList.html 페이지에서 게시글의 제목을 클릭하면 해당 게시글에 대한 상세 정보로 이동할 수 있게 코드를 아래와 같이 수정한다.
            <tr th:each="article : ${articles}">
                <td th:text="${article.id}"></td>
                <td>
                    <a th:href = "@{/articles/{id}(id=${article.id})}" th:text = "${article.title}"></a>
                </td>
                <td th:text="${article.content}"></td>
                <td th:text="${article.writer}"></td>
            </tr>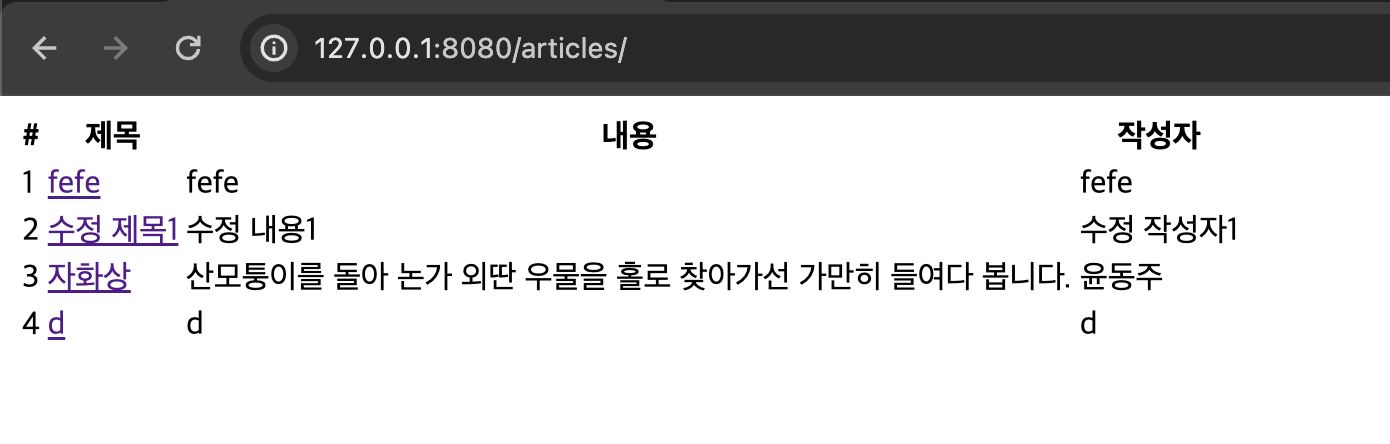
위의 코드를 보면 html에서 href 형식으로 /articles/해당id로 GET 요청을 하는 것을 알 수가 있다.
따라서 ArticleController에 다음 요청을 받는 GetMapping을 추가하고 요청 시, 해당 게시글의 상세 정보를 나타내는 articleDetail.html을 반환하는 코드를 아래와 같이 작성한다.
    @GetMapping("articles/{id}")
    public String detail(@PathVariable Long id, Model model) {
        Optional<Article> article = articleService.findOne(id);
        model.addAttribute("article", article.orElse(null));

        return "articles/articleDetail";
    }
여기서 눈여겨봐야할 점은 @PathVariable 어노테이션이다.
@PathVariable은 URL 경로에서 변수 값을 추출한다.
메소드의 매개변수에 이 어노테이션을 사용하면 해당 변수가 URL 경로에서 추출된 값을 가지게 된다.
위의 코드에서 @GetMapping("articles/{id}")은 "/articles/{id}" 경로로 들어오는 GET 요청을 처리하는데, @PathVariable Long id 매개변수에 {id} 값을 매핑한다.
따라서 해당 id를 가지고 어떤 Article 객체인지를 찾을 수 있다.
그리고 2장에서 Create와 Read를 할 때와 같이 Model을 통해 해당 Article 객체를 뷰에 전달하는 것을 알 수가 있다.
반환되는 articleDetail.html 코드는 아래와 같다.
<!DOCTYPE html>
<html xmlns:th="http://www.thymeleaf.org">
<head>
    <meta charset="UTF-8">
    <title>detailPage</title>
</head>
<body>

<div class="container">
    <h2>게시글 상세페이지</h2>
    <p>제목 : <span th:text="${article.title}"></span></p>
    <p>작성자 : <span th:text="${article.writer}"></span></p>
    <hr>
    <p>내용 : <span th:text="${article.content}"></span></p>
    <div>
        <a th:href="@{/articles/update/{id}(id=${article.id})}">수정하기</a>
    </div>
</div>
</body>
</html>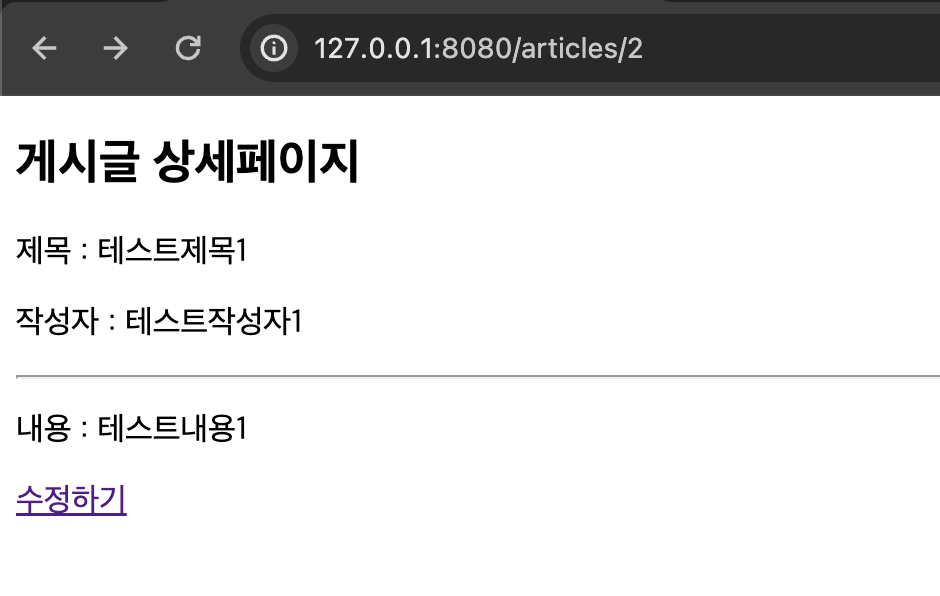
전달 받은 Article의 정보들을 보여주며, '수정하기'를 누르면 /articles/update/해당id에 해당하는 GET 요청을 한다.
Update 기능 추가하기
articleDetail 화면에서의 GET 요청에 따라 해당 uri의 controller를 추가한다.
    @GetMapping("articles/update/{id}")
    public String updateForm(@PathVariable Long id, Model model) {
        Optional<Article> article = articleService.findOne(id);
        model.addAttribute("article", article.orElse(null));

        return "articles/updateArticle";
    }
마찬가지로 @PathVariable 어노테이션을 통해 uri의 article id를 추출하고 해당 Article을 Model에 담아서 뷰에 전달한다.
그리고 updateArticle.html 화면으로 전환하여 게시글 정보를 수정할 수 있는 화면으로 전환한다.
아래는 updateArticle.html의 코드이다.
<!DOCTYPE html>
<html xmlns:th="<http://www.thymeleaf.org>">
<head>
    <meta charset="UTF-8">
    <title>updateArticle</title>
</head>
<body>

<div class="container">
    <form method="post" th:action ="@{/articles/update/{id}(id=${article.id})}">
        <div class="form-group">
            <label>작성자</label>
            <input type="text" name="writer" th:value = "${article.writer}">
            <br>
            <label>제목</label>
            <input type="text" name="title" th:value = "${article.title}">
            <br>
            <label>내용</label>
            <textarea name="content" th:text="${article.content}"></textarea>
            <br>
        </div>
        <button type="submit">게시글 수정</button>
    </form>
</div>

</body>
</html>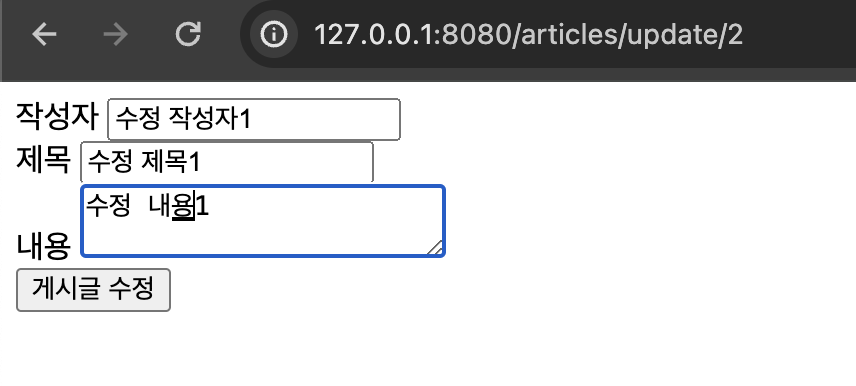
수정한 내용을 전달하기 위해 작성한 Article에 대한 내용을 '/articles/update/해당id' uri에 전송한다.
그리고 해당 POST 요청을 처리하기 위해 아래와 같은 코드를 ArticleController에 추가한다.
    @PostMapping("articles/update/{id}")
    public String update(@PathVariable Long id, Article newArticle) {
        articleService.update(id, newArticle);

        return "redirect:/articles/";
    }
마찬가지로 @PathVariable 어노테이션을 통해 uri에서 id를 추출한다.
id에 해당하는 기존의 Article을 html에서부터 받은 newArticle 객체에 대한 정보로 수정한다.
newArticle에 대한 정보는 @GetMapping("articles/update/{id}")에서 article 객체를 updateArticle.html로 전달했기 때문에 따로 객체를 전달하지 않아도 POST 요청시 전달이 된다.
Thymeleaf를 사용한 경우, 폼이 서버로 제출될 때 폼 안의 필드들의 값들은 해당 객체의 필드와 매핑되어 서버로 전송되는 특징이 있다.
따라서 @GetMapping("articles/update/{id}")에서 모델에 추가된 article 객체가 폼을 통해 서버로 다시 전송될 때 newArticle 매개변수로 자동으로 매핑된다는 것이다.
간단히 말하면, Thymeleaf에서는 폼의 필드와 객체의 필드를 자동으로 연결해주므로 별도로 newArticle 객체를 POST 요청에 대한 핸들러 메소드로 전달하지 않아도 된다.
마지막으로 Repository에 있는 기존 Article의 정보를 수정하고 저장해야하기 때문에 articleService에 아래와 같은 코드를 수정한다.
    public Long update(Long id, Article newArticle) {
        Optional<Article> optionalArticle = articleRepository.findById(id);

        if (optionalArticle.isPresent()) {
            Article originArticle = optionalArticle.get();
            originArticle.setTitle(newArticle.getTitle());
            originArticle.setContent(newArticle.getContent());
            originArticle.setWriter(newArticle.getWriter());

            return originArticle.getId();
        } else {
            return null;
        }
    }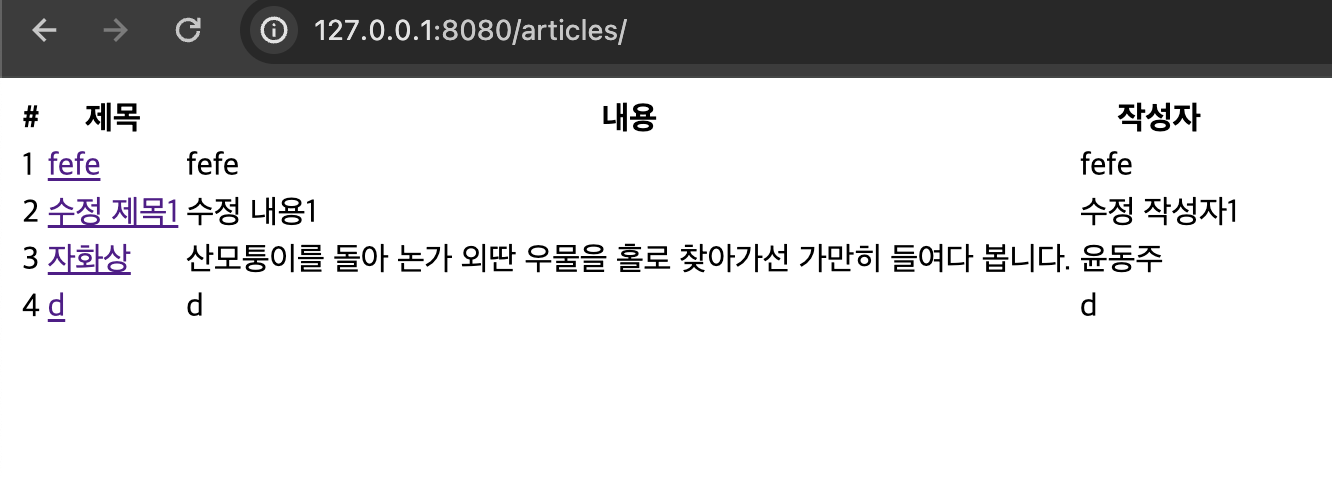
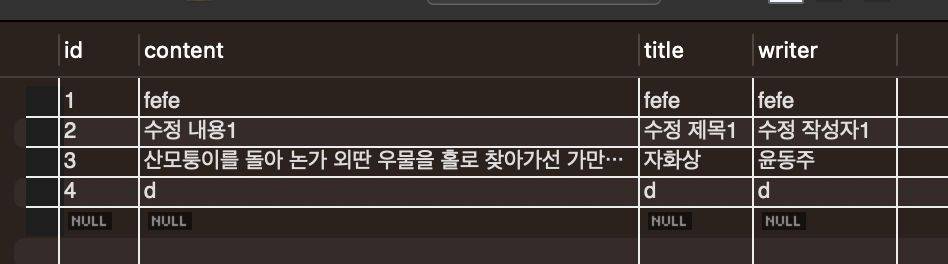
잘 수정이 되었고 MySQL에서도 데이터가 수정된 모습을 확인할 수 있다.
이로써 게시판의 Update 기능을 추가하였다.
기존 코드는 Optional을 사용하지 않고 Article로 선언하여 예외처리를 하지 않았다.
// 기존 코드
Article originarticle = articleRepository.findById(id).get();
// 수정 코드
Optional<Article> optionalArticle = articleRepository.findById(id);
 if (optionalArticle.isPresent()) {
  // ...
  }
하지만, 기존의 코드는 해당 ID에 해당하는 게시글이 없는 경우 NoSuchElementException을 발생할 수 있는 문제점이 있었다.
null 체크를 통해 안전성을 높이기 위해 Optional을 사용하였다.
간단한 게시판 기능이지만 신경써야할 것이 꽤나 있었다.
아무튼 ! 어찌저찌 CRUD에서 CRU 세 가지 기능을 구현하였다.
다음 시간에는 Delete 기능을 추가해보도록 하겠다.